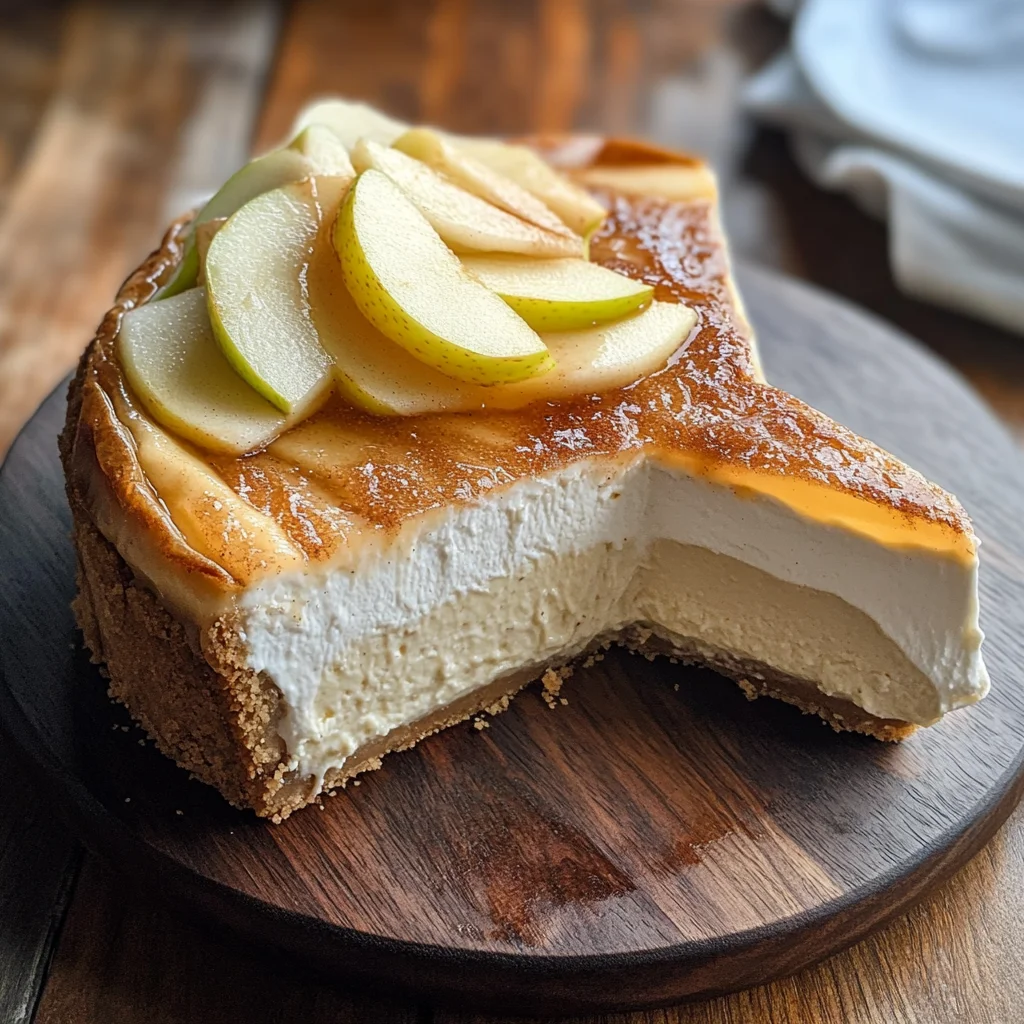
Apple Cider Cheesecake
Creamy and delicious, Apple Cider Cheesecake is the perfect dessert for any autumn gathering. This recipe combines the tangy flavor of fresh apple cider with rich cream cheese for a delightful treat that will impress your guests. Whether you’re hosting a holiday dinner or looking for a cozy dessert to enjoy at home, this cheesecake is sure to shine on your table. With its unique flavors and creamy texture, it encapsulates the essence of fall in every bite.
Why You’ll Love This Recipe
- Easy to Make: This cheesecake recipe simplifies the traditional approach, making it accessible for bakers of all levels.
- Festive Flavor: The use of fresh apple cider and mulling spices gives this cheesecake a truly seasonal taste that everyone will love.
- Versatile Dessert: Perfect for Thanksgiving, Christmas, or any fall gathering, this cheesecake suits various occasions.
- Showstopper Presentation: The tall, elegant cheesecake not only tastes amazing but also looks impressive on any dessert table.
- Rich & Creamy Texture: The blend of cream cheese and sour cream creates a smooth texture that melts in your mouth.
Tools and Preparation
Before diving into the recipe, make sure you have the right tools ready. Having everything prepared will ensure a smooth baking process.
Essential Tools and Equipment
- Food processor
- Stand mixer with paddle attachment
- 8” round springform pan or an 8 wide cake pan
- 13×9” baking pan (for water bath)
- Measuring cups and spoons
- Baking foil
Importance of Each Tool
- Food processor: This tool makes preparing the crust quick and efficient by grinding cookies into fine crumbs.
- Stand mixer: Ensures that your cream cheese mixture is perfectly smooth without lumps, which is key for a creamy cheesecake.
- Springform pan: Allows for easy removal of the cheesecake once it’s baked, keeping its shape intact for a beautiful presentation.
Ingredients
Creamy cheesecake is made with reduced fresh apple cider giving it a tangy, tart and most autumn-like apple flavor.
Ingredients:
– 2 cups digestive cookies or graham crackers (270g)
– ½ cup butter (melted) (113g)
– 1/4 teaspoon salt
– 2 tablespoons powdered sugar
– 3 cups fresh apple cider (honeycrisp cider is more tart!)
– mulling spices
– 3 cream cheese bricks (227g each, softened and at room temperature)
– 1 cup brown sugar (220g)
– ½ teaspoon salt
– 2 teaspoons pure vanilla extract
– 1 cup sour cream (240g)
– 1/3 cup reduced apple cider (from above)
– 1 teaspoon cinnamon
– 3 large eggs
– 2 tablespoons all purpose flour
How to Make Apple Cider Cheesecake
Step 1: Boil the Cider
Boil the cider with the mulling spices on high in a large pot for about 1 hour until it reduces to a thick syrup. You should end up with about 1/3 cup. Set aside and allow to cool.
Step 2: Preheat the Oven
Preheat your oven to 350 F.
Step 3: Make the Crust
In your food processor:
1. Pulse the cookies until finely ground.
2. Add the melted butter, salt, and powdered sugar.
3. Pulse until everything comes together in wet crumbs.
Step 4: Prepare the Pan
Press the cookie crumbs into an 8” round springform pan wrapped with foil or into an greased and lined cake pan.
1. Bake for about 10 minutes.
2. Allow to cool then chill.
Step 5: Lower Oven Temperature
Reduce the oven temperature to 325 F once your crust has cooled.
Step 6: Mix Cream Cheese Filling
In a stand mixer fitted with the paddle attachment:
1. Beat together cream cheese and brown sugar until completely lump-free.
2. Scrape down sides as needed during mixing.
Step 7: Add Remaining Ingredients
Add sour cream, vanilla extract, salt, cinnamon, and reduced apple cider:
1. Blend until very creamy.
Step 8: Incorporate Eggs and Flour
Add eggs and flour:
1. Beat until just combined; do not overmix.
Step 9: Prepare Water Bath
Place your cheesecake pan inside a larger baking pan filled with hot water to create a water bath.
Step 10: Bake Cheesecake
Pour filling into the crust:
1. Bake for about 90 minutes until edges are set but middle remains slightly wobbly.
Step 11: Cool in Oven
Turn off the oven but leave cheesecake inside:
1. Use a wooden spoon to crack open the oven door.
2. Let cool inside for about 30 minutes.
Step 12: Final Cooling Steps
Close oven door after cooling time:
1. Allow cheesecake to cool another 15 minutes before removing from oven.
Step13: Chill Before Serving
Let cool on counter then refrigerate for at least eight hours before serving.
Enjoy your deliciously creamy Apple Cider Cheesecake!
How to Serve Apple Cider Cheesecake
Apple Cider Cheesecake is a delightful dessert that captures the essence of autumn. Here are some serving suggestions to elevate your experience.
Classic Slice
- Serve a generous slice of cheesecake on a plate with an extra drizzle of reduced apple cider for added flavor.
Whipped Cream Topping
- Add a dollop of freshly whipped cream on top. This light addition complements the richness of the cheesecake beautifully.
Caramel Drizzle
- Drizzle warm caramel sauce over the cheesecake. The sweet, buttery flavor pairs perfectly with the tangy notes of the apple cider.
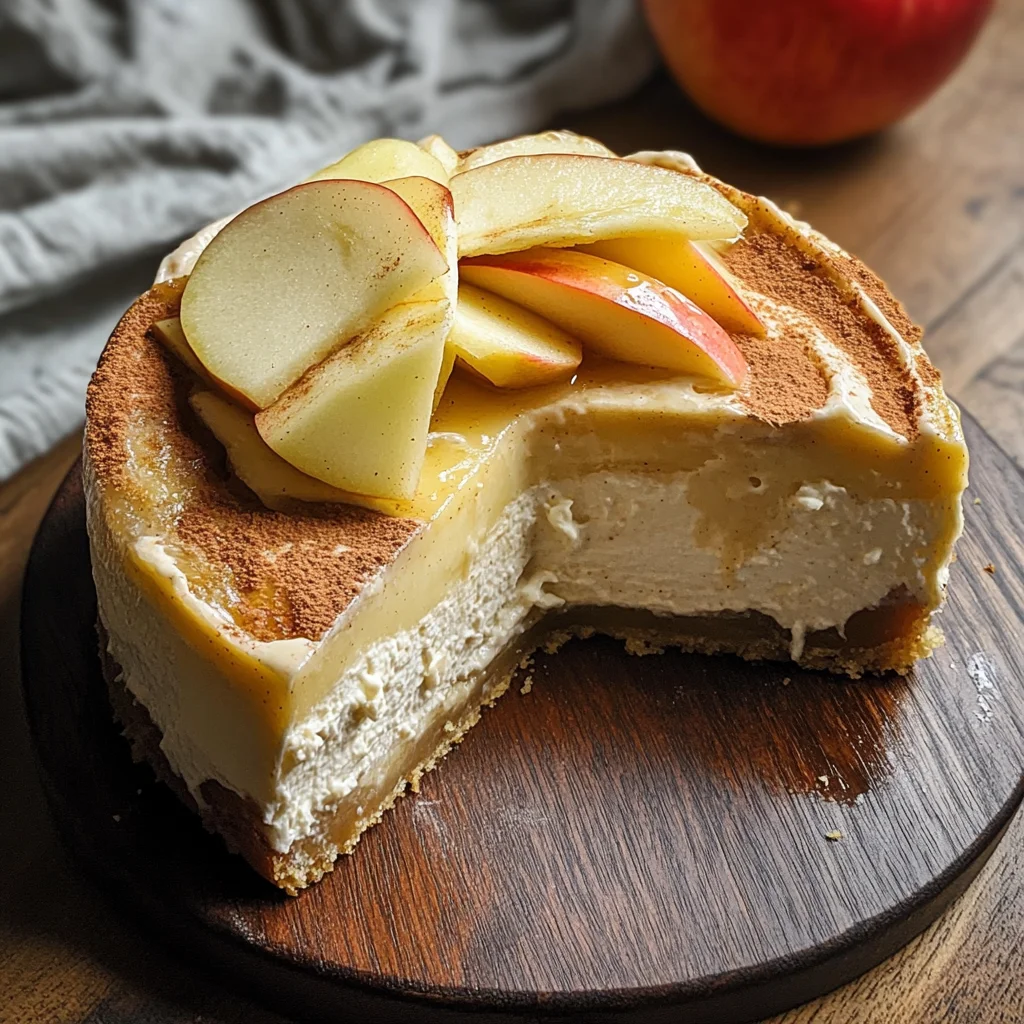
Cinnamon Dusting
- Lightly sprinkle ground cinnamon over each slice before serving. This enhances the spice profile and adds visual appeal.
Fresh Apple Slices
- Garnish your cheesecake with thin slices of fresh apples for a refreshing crunch that contrasts nicely with the creamy texture.
Ice Cream Pairing
- Serve with a scoop of vanilla ice cream on the side. The cold ice cream balances the warmth from spices used in the cheesecake.
How to Perfect Apple Cider Cheesecake
To ensure your Apple Cider Cheesecake turns out flawlessly, follow these helpful tips.
-
Use room temperature ingredients: This helps achieve a smooth and creamy texture by allowing all components to blend easily without lumps.
-
Don’t overmix: After adding eggs and flour, mix just until combined. Overmixing can lead to a dense texture in your cheesecake.
-
Cool gradually: Allowing your cheesecake to cool slowly in the oven helps prevent cracks on the surface.
-
Use a water bath: Baking your cheesecake in a water bath keeps it moist and helps it cook evenly, resulting in a better texture.
-
Chill thoroughly: Letting your cheesecake chill in the fridge for at least 8 hours allows flavors to meld and improves overall taste.
Best Side Dishes for Apple Cider Cheesecake
Pairing side dishes with your Apple Cider Cheesecake can create a balanced meal experience. Here are some great options:
-
Spiced Pear Salad: A fresh salad featuring spiced pears complements the rich flavors of the cheesecake while adding a crisp texture.
-
Roasted Nuts: A bowl of mixed roasted nuts provides crunch and savory contrast, making it an ideal accompaniment.
-
Caramelized Apples: Sweet caramelized apples enhance the apple flavor theme and add warmth to your dessert table.
-
Pumpkin Soup: A light bowl of pumpkin soup offers seasonal warmth without overshadowing your dessert’s flavors.
-
Cheese Platter: Include a variety of cheeses that range from sharp to mild; this creates an interesting tasting experience alongside the sweet cheesecake.
-
Ginger Snap Cookies: These cookies add spice and crunch, making them perfect for dipping into any extra apple cider sauce served with the cheesecake.
Common Mistakes to Avoid
Making an Apple Cider Cheesecake can be a delightful experience, but there are common pitfalls that can affect your final result. Here are some mistakes to watch out for:
-
Using Cold Ingredients: Always use softened cream cheese and room temperature eggs. Cold ingredients can result in lumps in your cheesecake.
-
Not Reducing the Cider Enough: Failing to boil down the apple cider to a syrupy consistency can leave your cheesecake watery. Ensure you reduce it properly before using.
-
Skipping the Water Bath: Not using a water bath while baking can lead to cracks on the surface of your cheesecake. The moisture helps create an even baking environment.
-
Overmixing the Batter: Mixing too much after adding the eggs can incorporate too much air, resulting in cracks. Mix until just combined for a smooth texture.
-
Not Cooling Gradually: Rapid cooling of the cheesecake can cause it to crack. Let it cool gradually in the oven for the best results.
-
Serving Too Soon: Allowing your cheesecake to chill for at least 8 hours enhances its flavor and texture. Patience is key!
Storage & Reheating Instructions
Refrigerator Storage
- Store in an airtight container for up to 5 days.
- Cover with plastic wrap if not using a container to prevent drying out.
Freezing Apple Cider Cheesecake
- Wrap tightly in plastic wrap, then foil for maximum freshness.
- Freeze for up to 2 months; thaw in the refrigerator overnight before serving.
Reheating Apple Cider Cheesecake
- Oven: Preheat to 350°F and cover loosely with foil, reheating for about 10-15 minutes.
- Microwave: Heat individual slices on medium power for about 30 seconds or until warmed through.
- Stovetop: Place slices in a skillet over low heat with a lid, warming gently for about 5-7 minutes.
Frequently Asked Questions
Here are some common queries regarding the Apple Cider Cheesecake recipe:
Can I use other types of cider?
Yes, you can experiment with different apple ciders, but honeycrisp cider gives a more tart flavor that enhances the cheesecake’s taste.
What’s the best way to prevent cracks?
To prevent cracks in your Apple Cider Cheesecake, ensure you use a water bath while baking and let it cool gradually inside the oven.
How long does Apple Cider Cheesecake last?
Properly stored, Apple Cider Cheesecake will last up to 5 days in the fridge or up to 2 months in the freezer.
Can I make this cheesecake without mulling spices?
Yes, if you prefer, you can omit mulling spices or substitute them with cinnamon and nutmeg for flavor.
Final Thoughts
The Apple Cider Cheesecake is a perfect dessert that combines creamy richness with delightful apple flavors. Its versatility allows you to customize with various spices or toppings like caramel or whipped cream. This cozy treat is sure to impress at any gathering—give it a try!
Apple Cider Cheesecake
Indulge in the warmth of autumn with this creamy Apple Cider Cheesecake, a delightful dessert that perfectly balances tangy apple flavors and rich creaminess.
- Prep Time: 30 minutes
- Cook Time: 90 minutes
- Total Time: 2 hours
- Yield: Serves approximately 12 slices 1x
- Category: Dessert
- Method: Baking
- Cuisine: American
Ingredients
- 2 cups digestive cookies or graham crackers
- ½ cup melted butter
- 3 cups fresh apple cider
- Mulling spices
- 3 bricks (8 oz each) softened cream cheese
- 1 cup brown sugar
- 1 cup sour cream
- 3 large eggs
- 2 tablespoons all-purpose flour
Instructions
- Boil apple cider with mulling spices until reduced to about 1/3 cup; set aside to cool.
- Preheat oven to 350°F.
- In a food processor, pulse cookies into crumbs; mix with melted butter, salt, and powdered sugar.
- Press mixture into an 8” springform pan and bake for 10 minutes; cool.
- Reduce oven temperature to 325°F.
- Beat cream cheese and brown sugar until smooth; add sour cream, vanilla, salt, cinnamon, and reduced cider. Blend until creamy.
- Incorporate eggs and flour gently until just combined.
- Place cheesecake pan in a larger pan filled with hot water; pour filling into crust.
- Bake for about 90 minutes until edges are set but center is slightly wobbly.
- Cool in the oven with door ajar for 30 minutes; refrigerate for at least eight hours before serving.
Nutrition
- Serving Size: 1 slice (80g)
- Calories: 330
- Sugar: 25g
- Sodium: 250mg
- Fat: 22g
- Saturated Fat: 12g
- Unsaturated Fat: 8g
- Trans Fat: 0g
- Carbohydrates: 30g
- Fiber: 1g
- Protein: 5g
- Cholesterol: 85mg